INSTRUCTIONS FOR USE OF DEMOCRITUS DIGITAL ACUITY & READING TEST - DDART
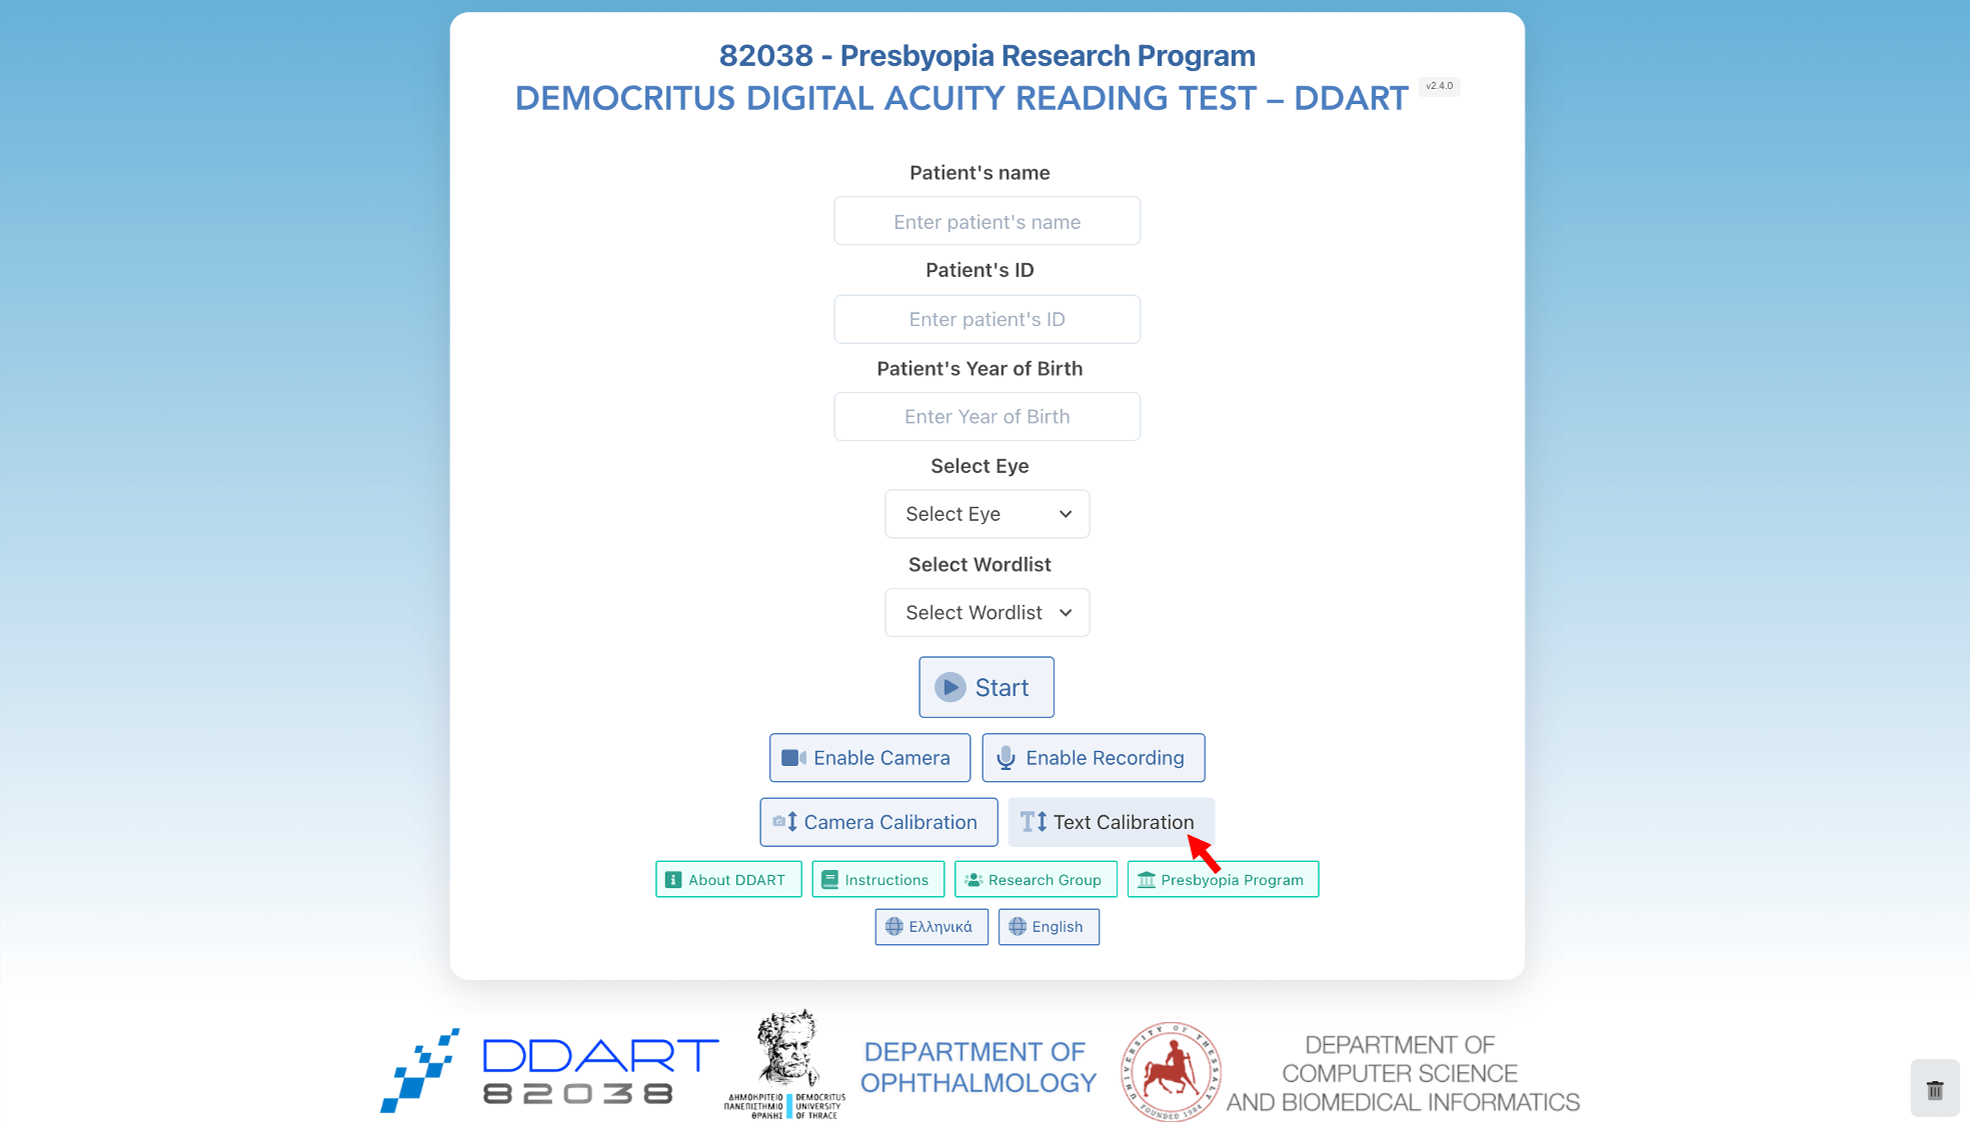
1. First, the main menu appears with empty text fields.
.png&w=3840&q=75)
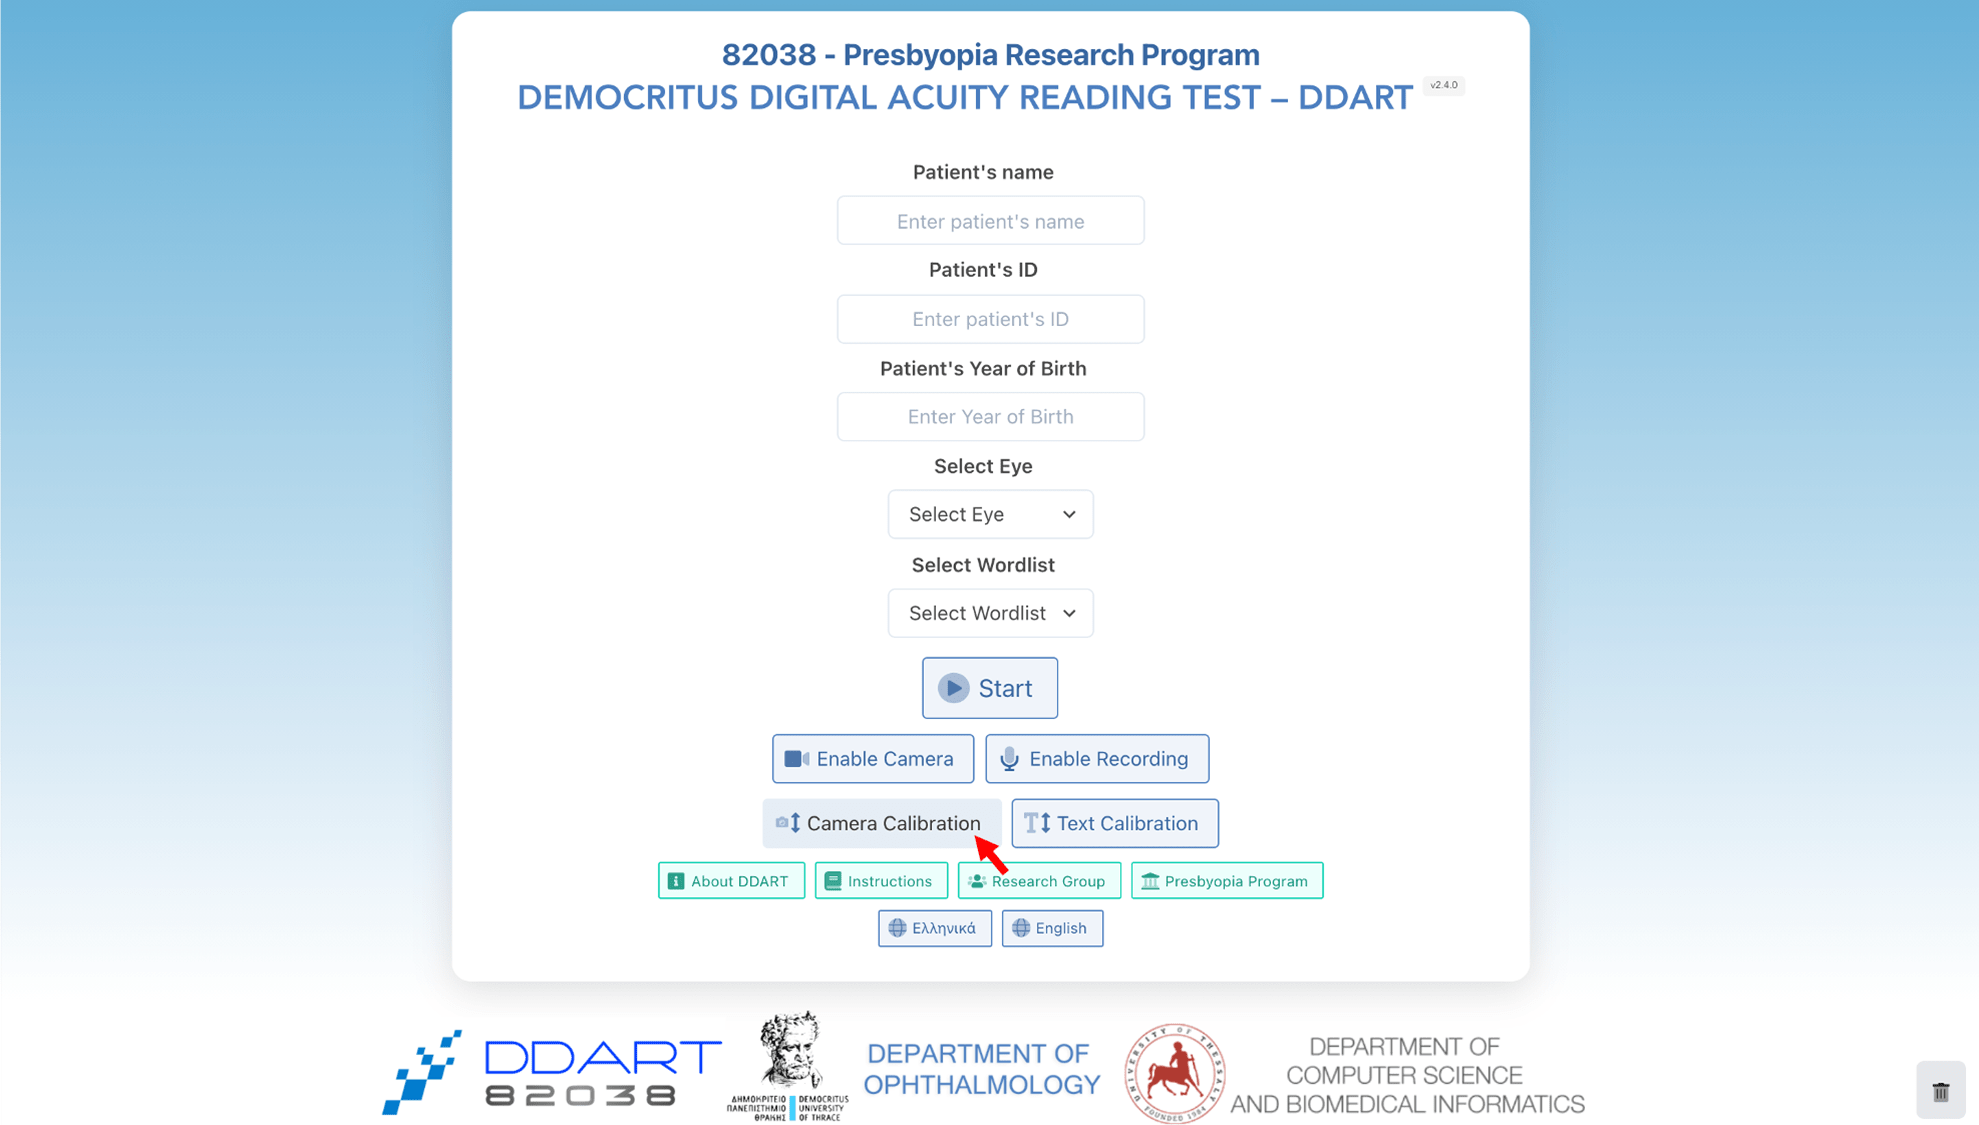
2. Select “Text Calibration”.
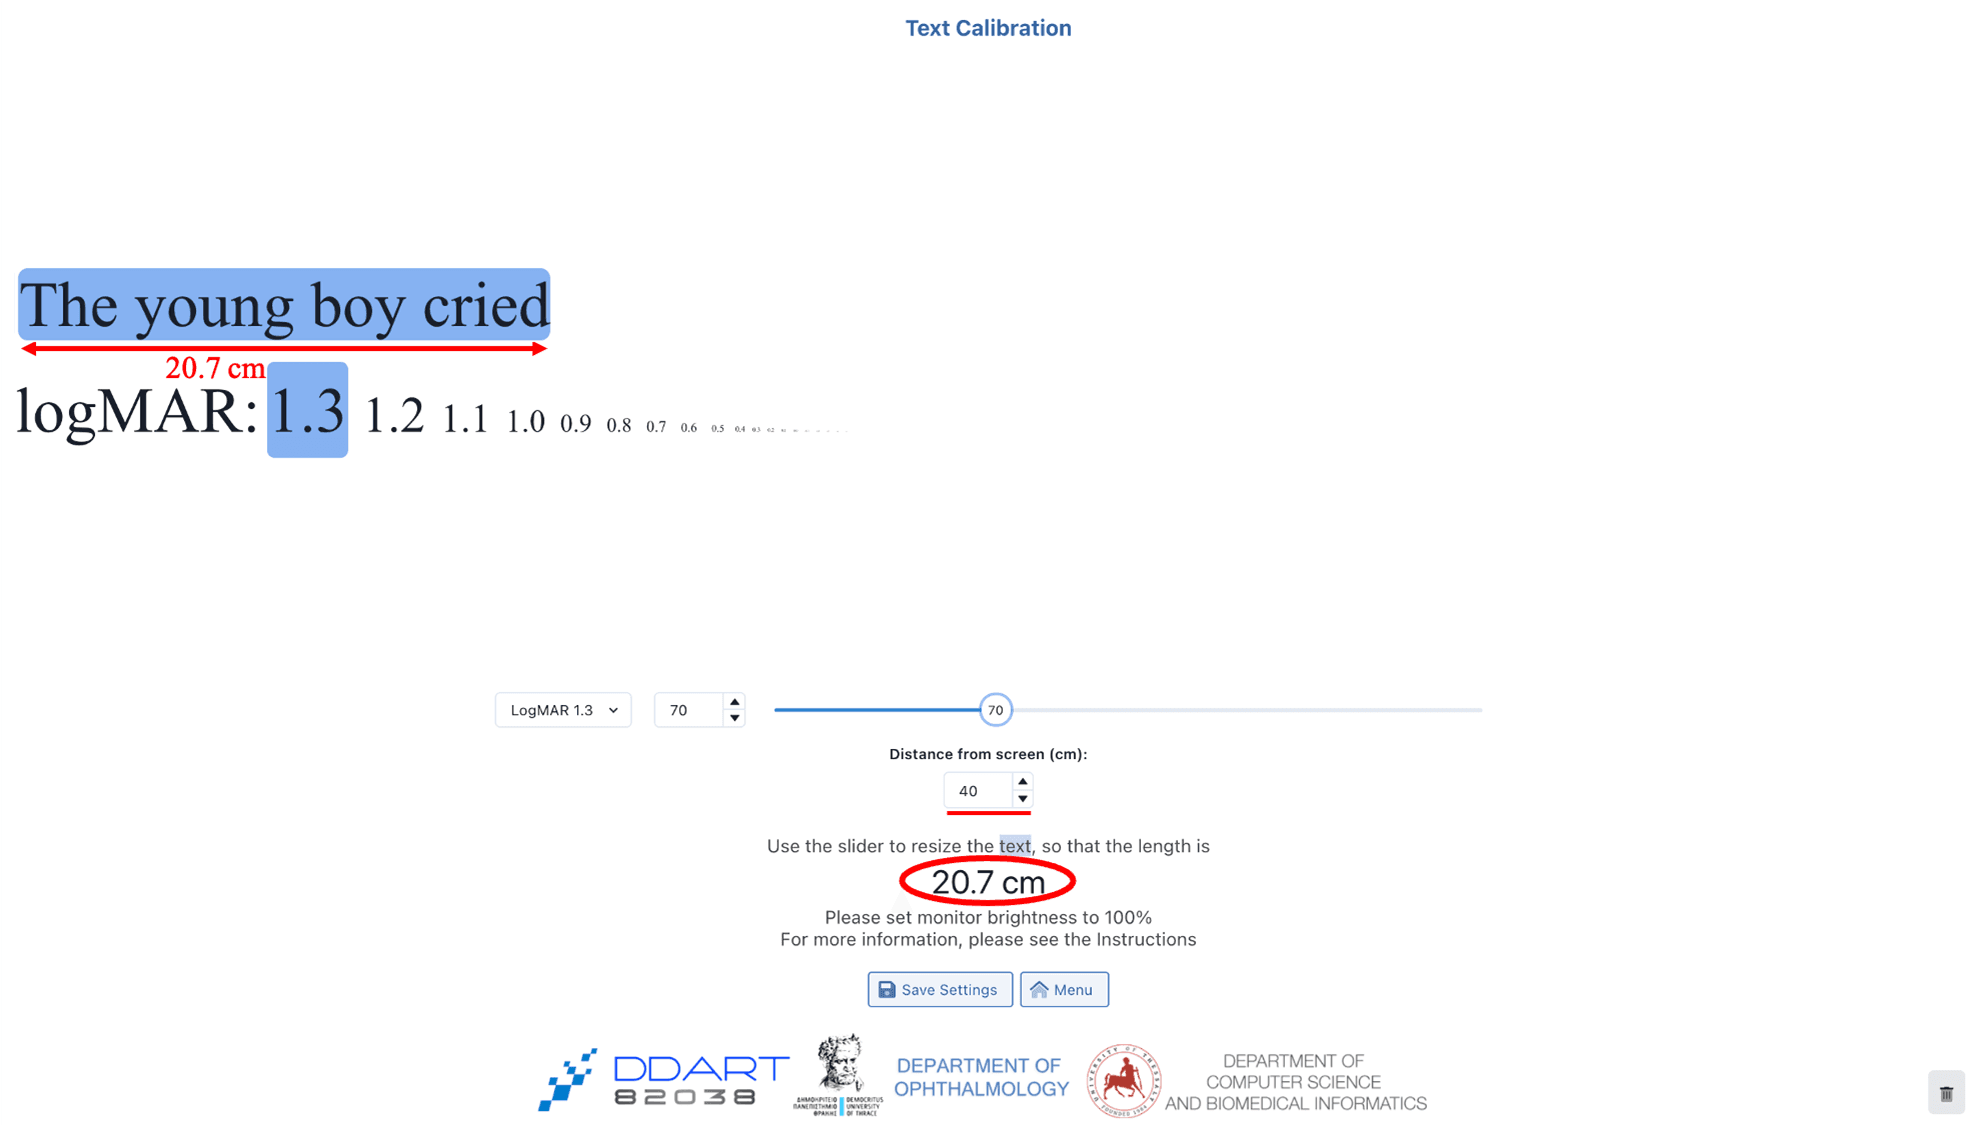
3. Set the distance at which the examination will take place. The default distance value is equal to 40 cm.
(a)
(b)
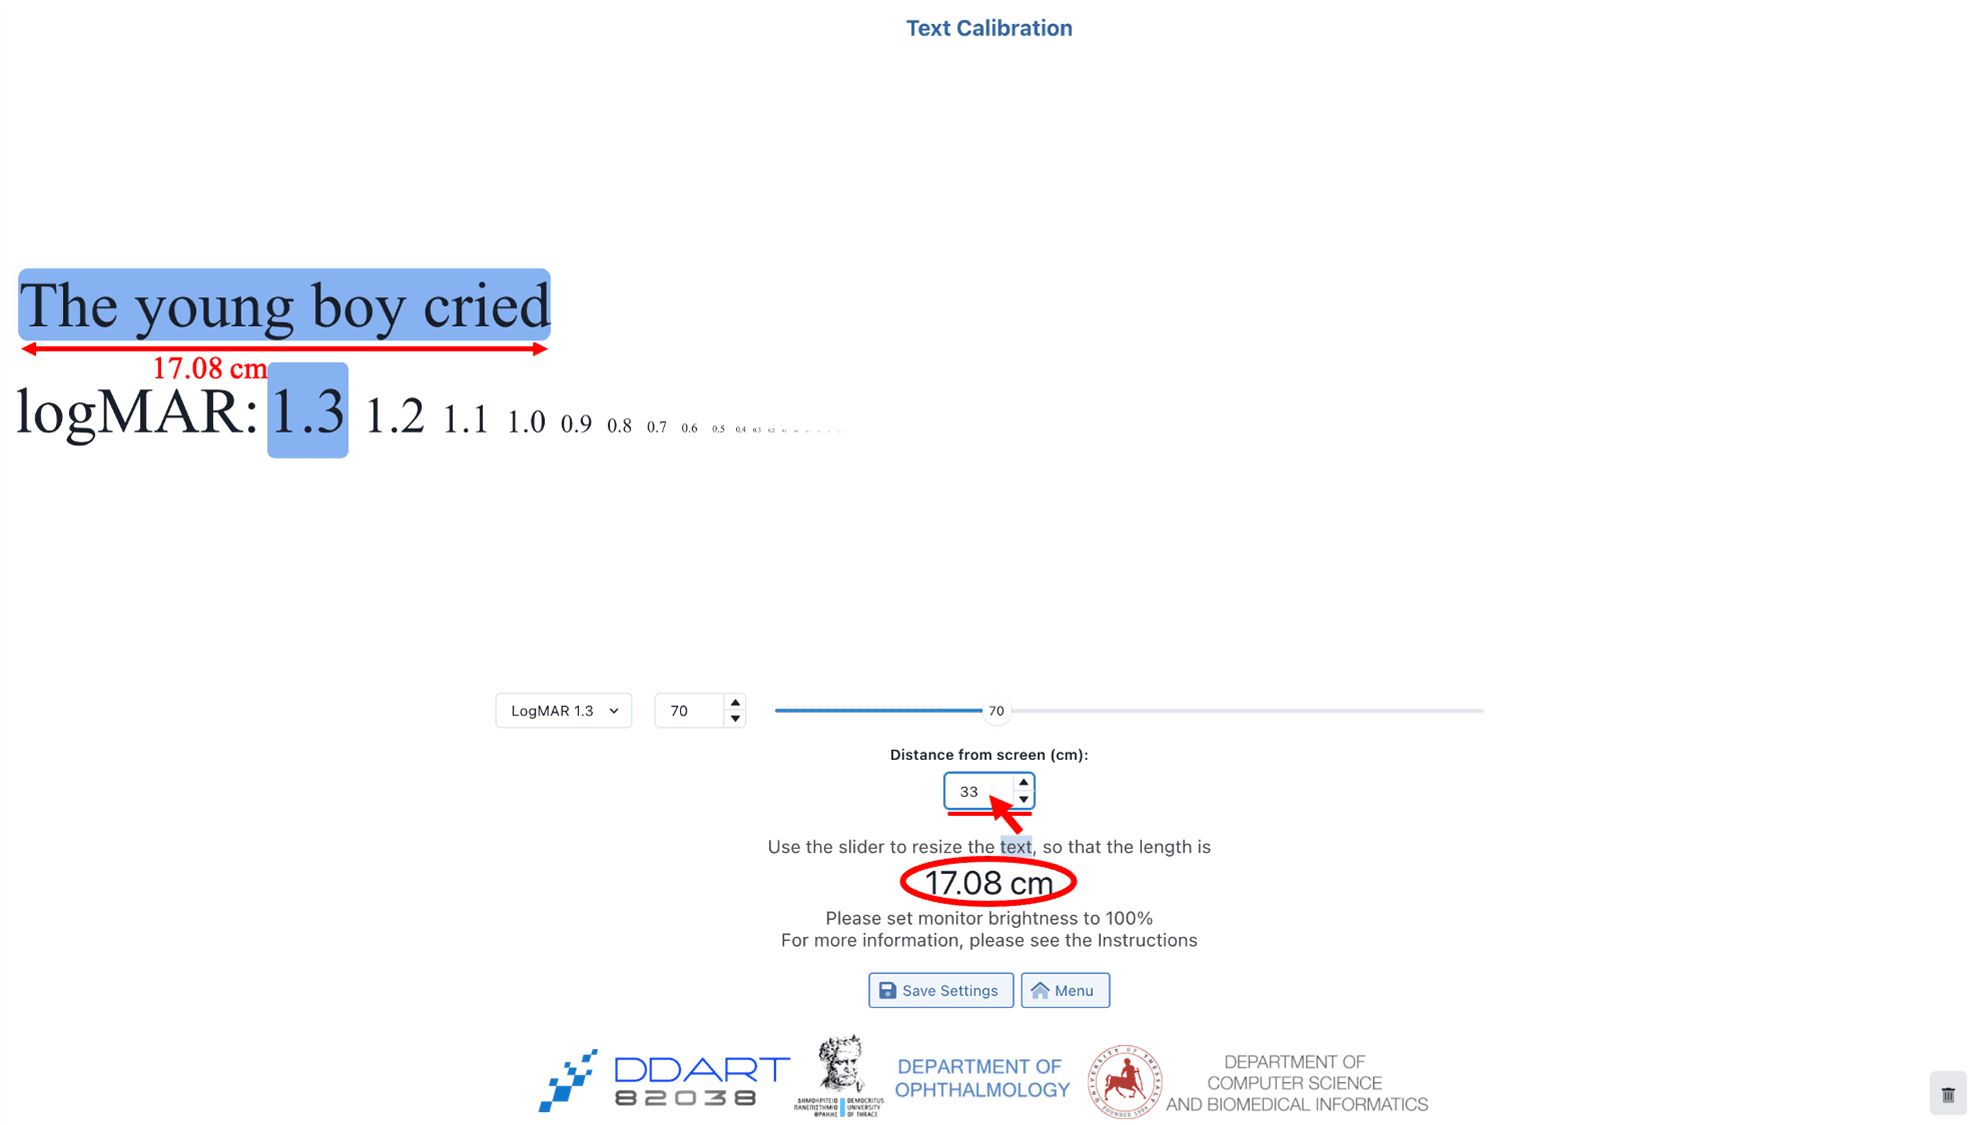
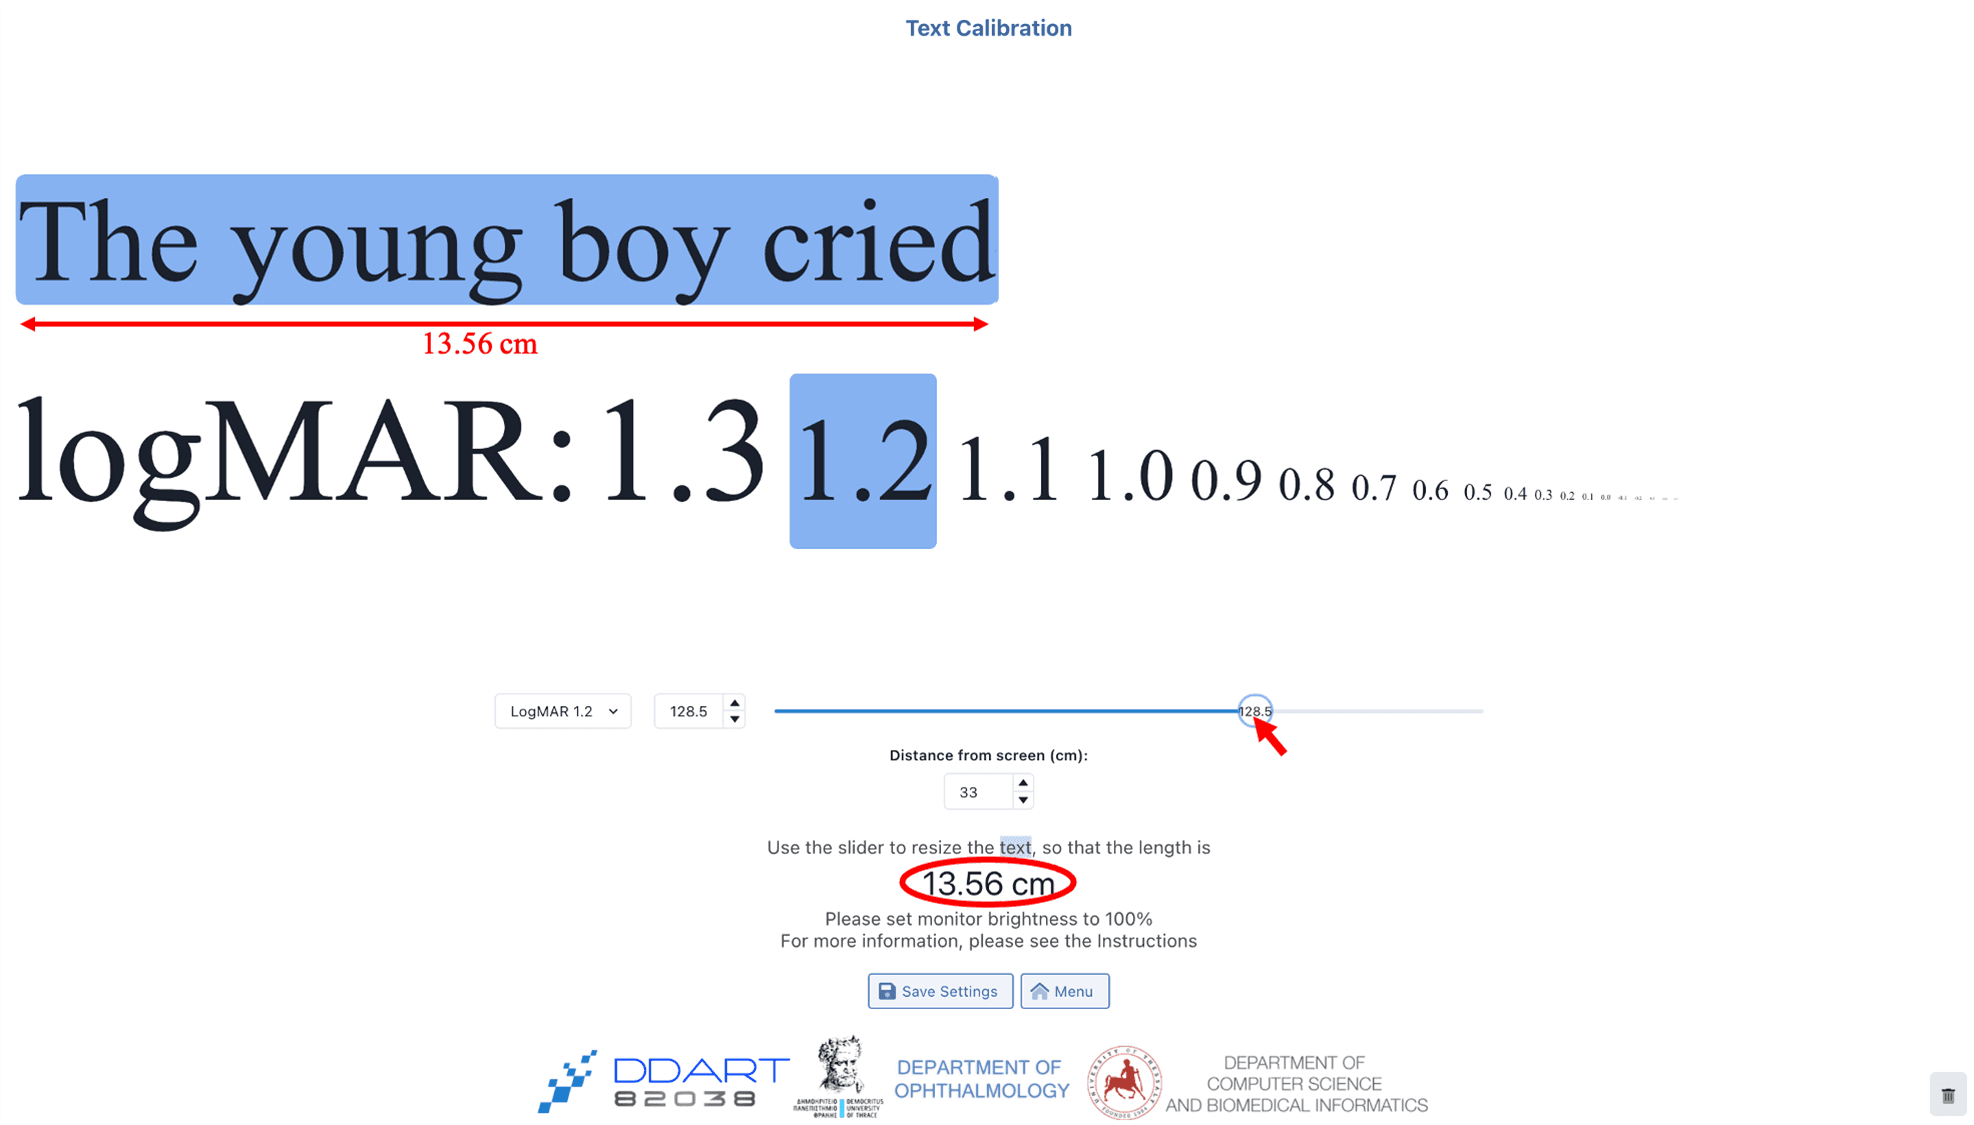
4. The system calculates automatically the correct length of the blue highlighted sentence (“text”) for the selected character size (in logMAR).
5. (a) Place a ruler on the screen and adjust the blue highlighted sentence using the slider, so that the length of the highlighted sentence is equal to the correct length (calculated by the system).
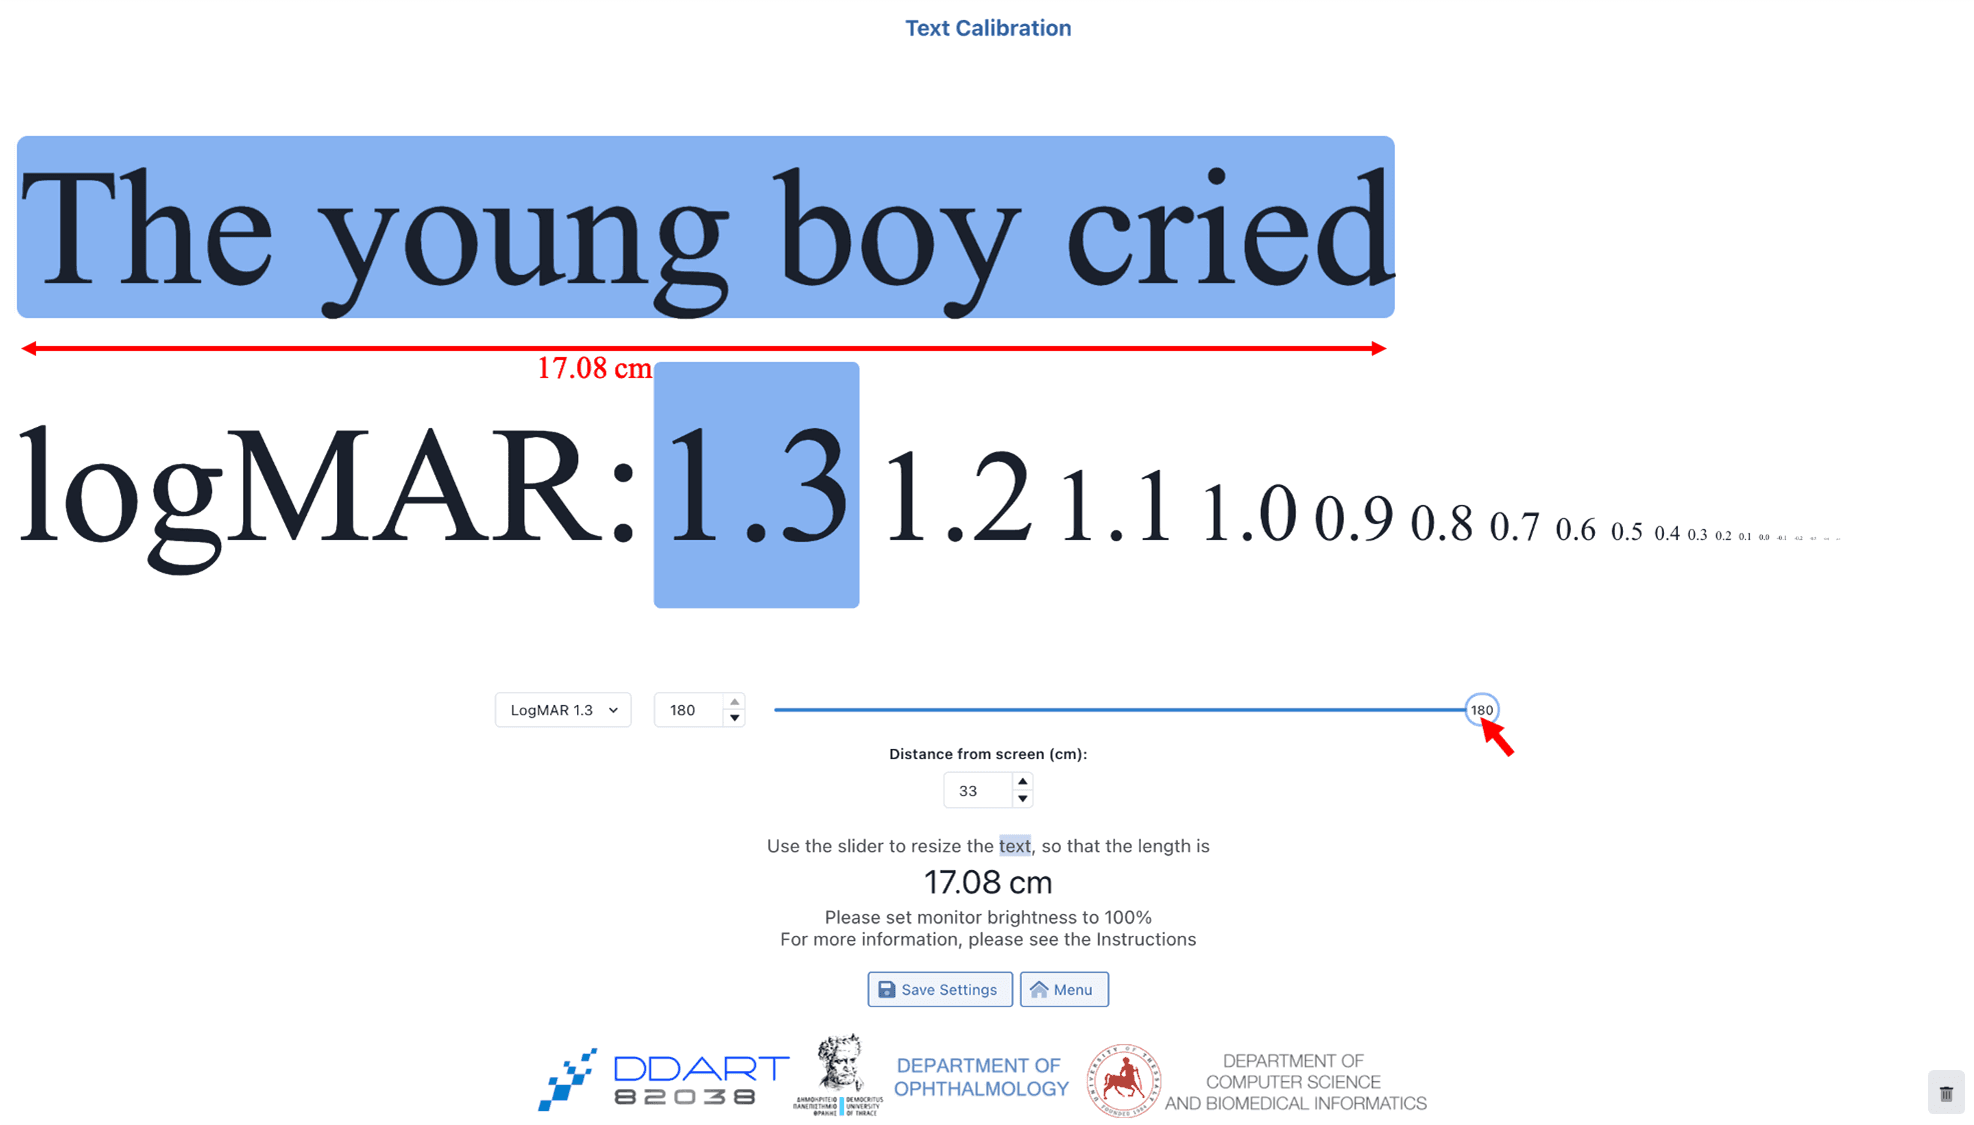
5. (b) Select the text size (in logMAR) to be used for the calibration. The default value is logMAR=1.3.

This step is useful in cases where the size of the screen does not allow the display of the full sentence in high logMAR values at certain distances, thus the examination may start from a smaller logMAR value.
6. (a) Press “Save Settings”.

6. (b) A green message of successful text calibration will appear on the bottom right corner

6. (c) The browser zoom level must remain unchanged after the Text Calibration is completed.
7. (a) In case you wish to reset the settings in text calibration, you can press the rubbish bin on the bottom right corner.

7. b) The user is redirected to Step 3a.
8. Press “Menu” to return to the main menu.

9. In case you want to enable camera for assessment of your patient’s distance (optional), select “Camera Calibration” from the main menu.
10. On the “Camera Calibration” menu press “Enable Camera” for calibration and place your patient 50 cm away from the camera.
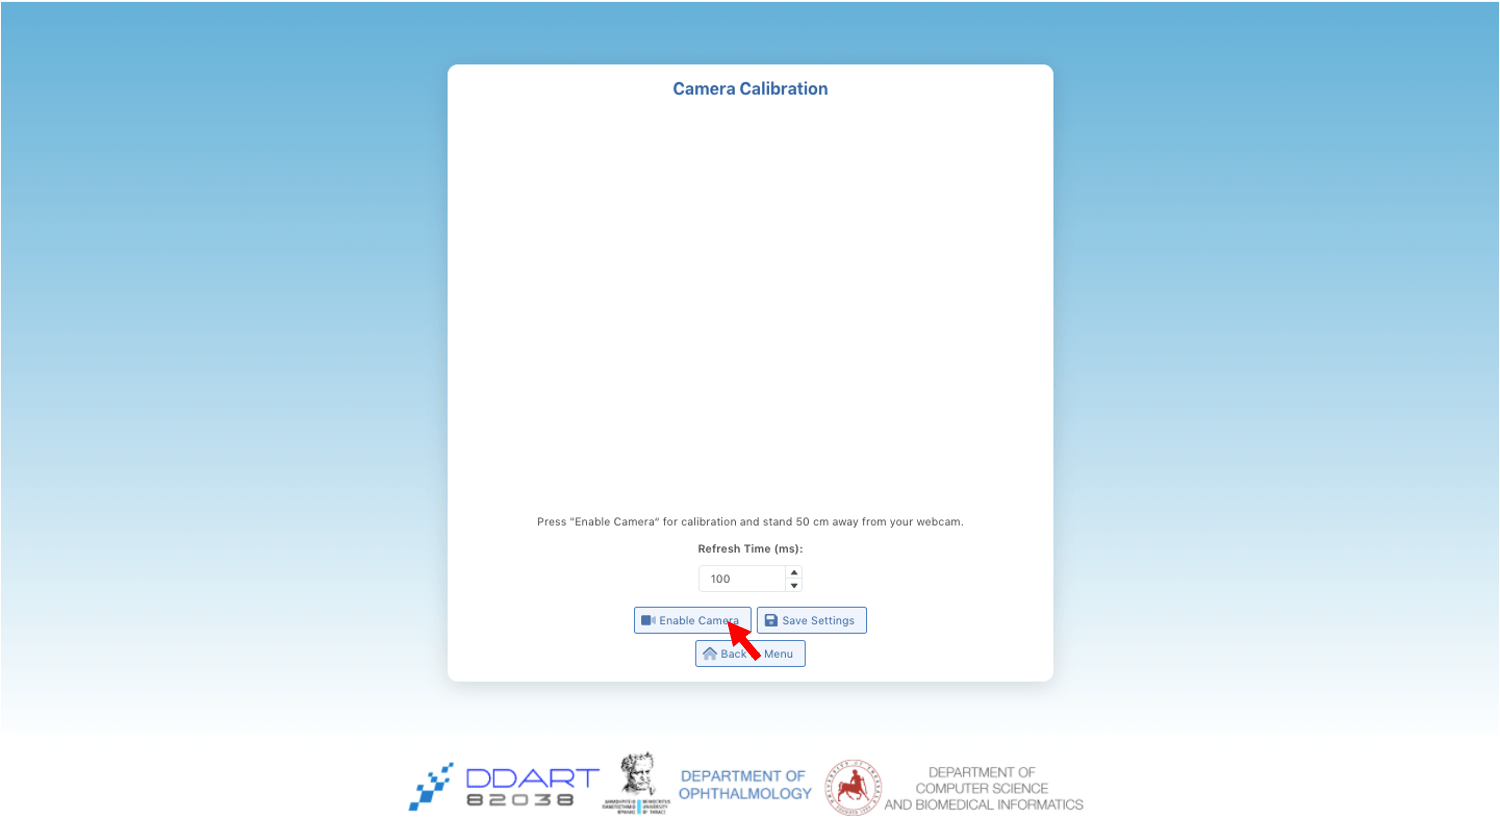
11. The face detection process will begin and graphics will be displayed on the monitor for the calibration. Distance calculation refresh rate may be specified at the “Refresh time” field (default value: 100 ms).
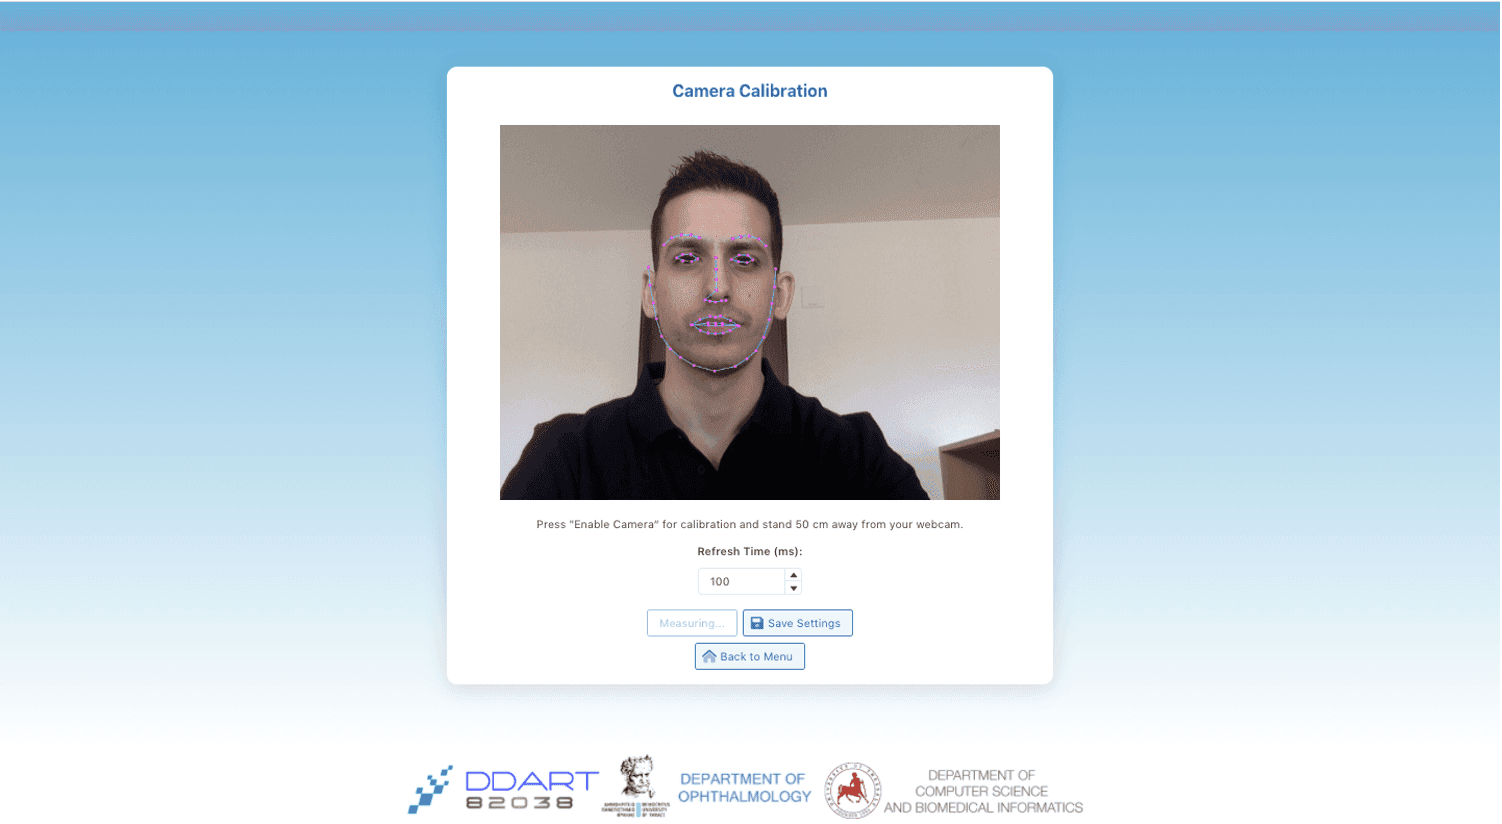
12. (a) Once the calibration has been completed, press “Save Settings”.

12. (b) A green message of successful camera calibration will appear on the bottom right corner.

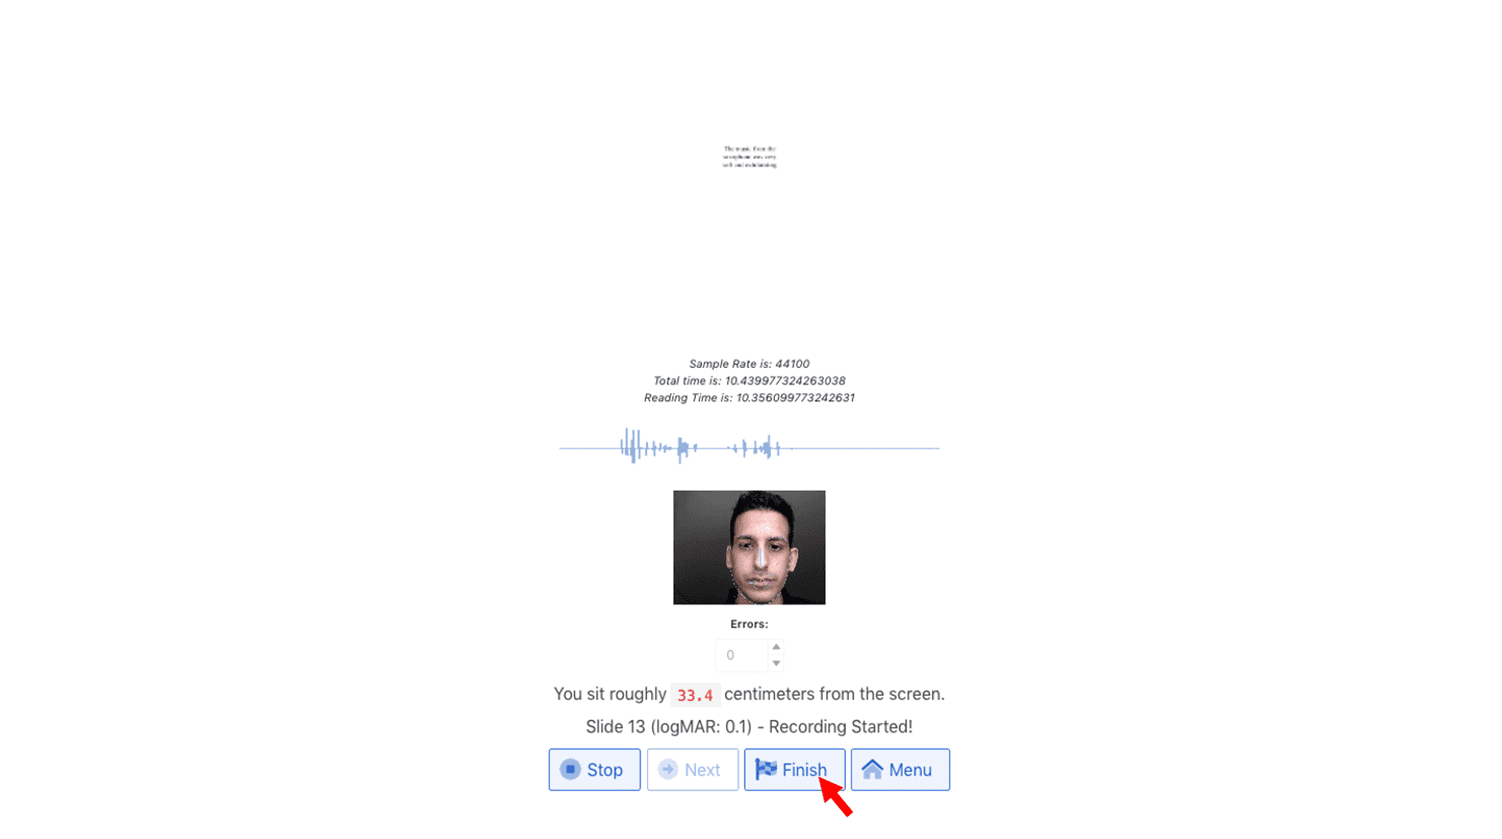
13. Press “Back to Menu” to return to the main menu.

14. Enter the examinee’s name, ID / AMKA (11 digits), year of birth and select the eye for examination (OD: right eye, OS: left eye, OU: both eyes).
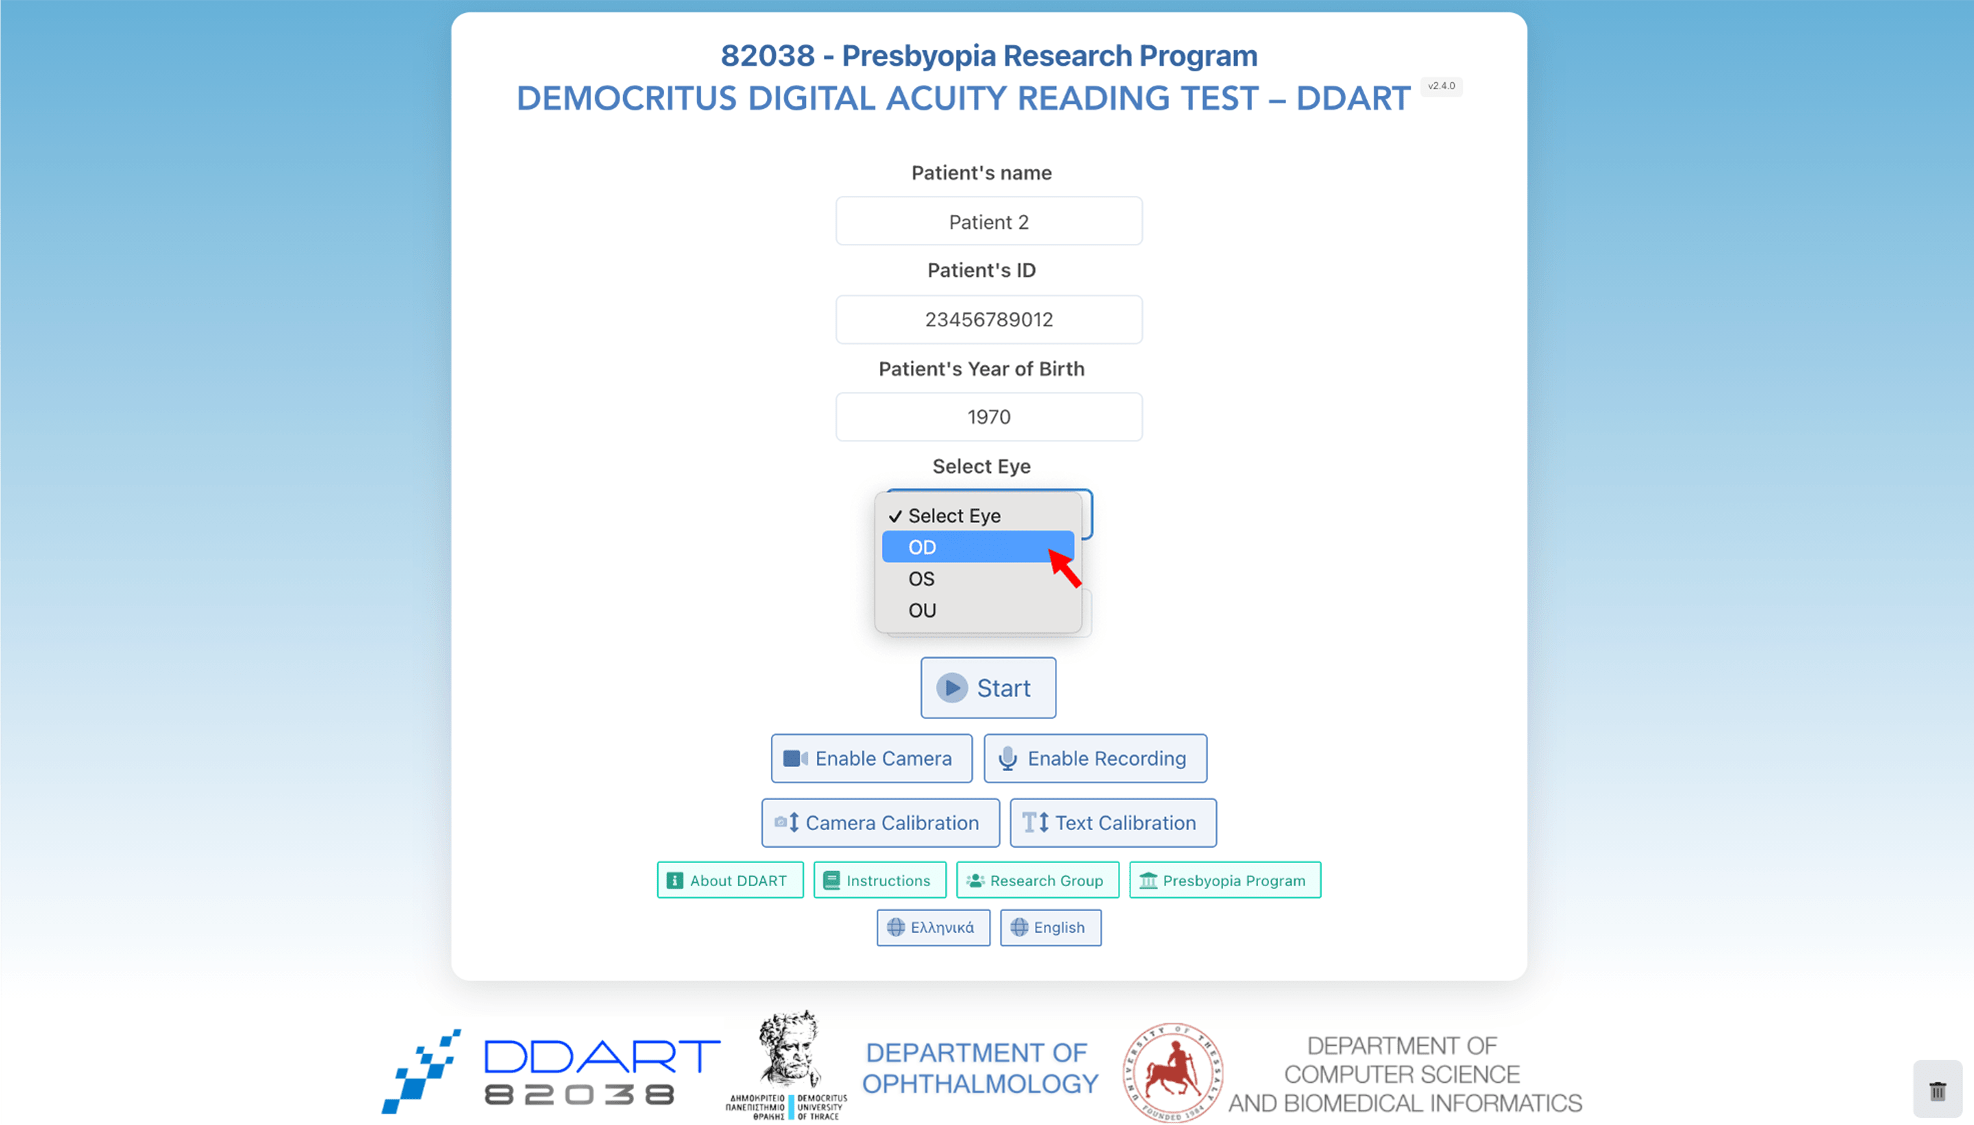
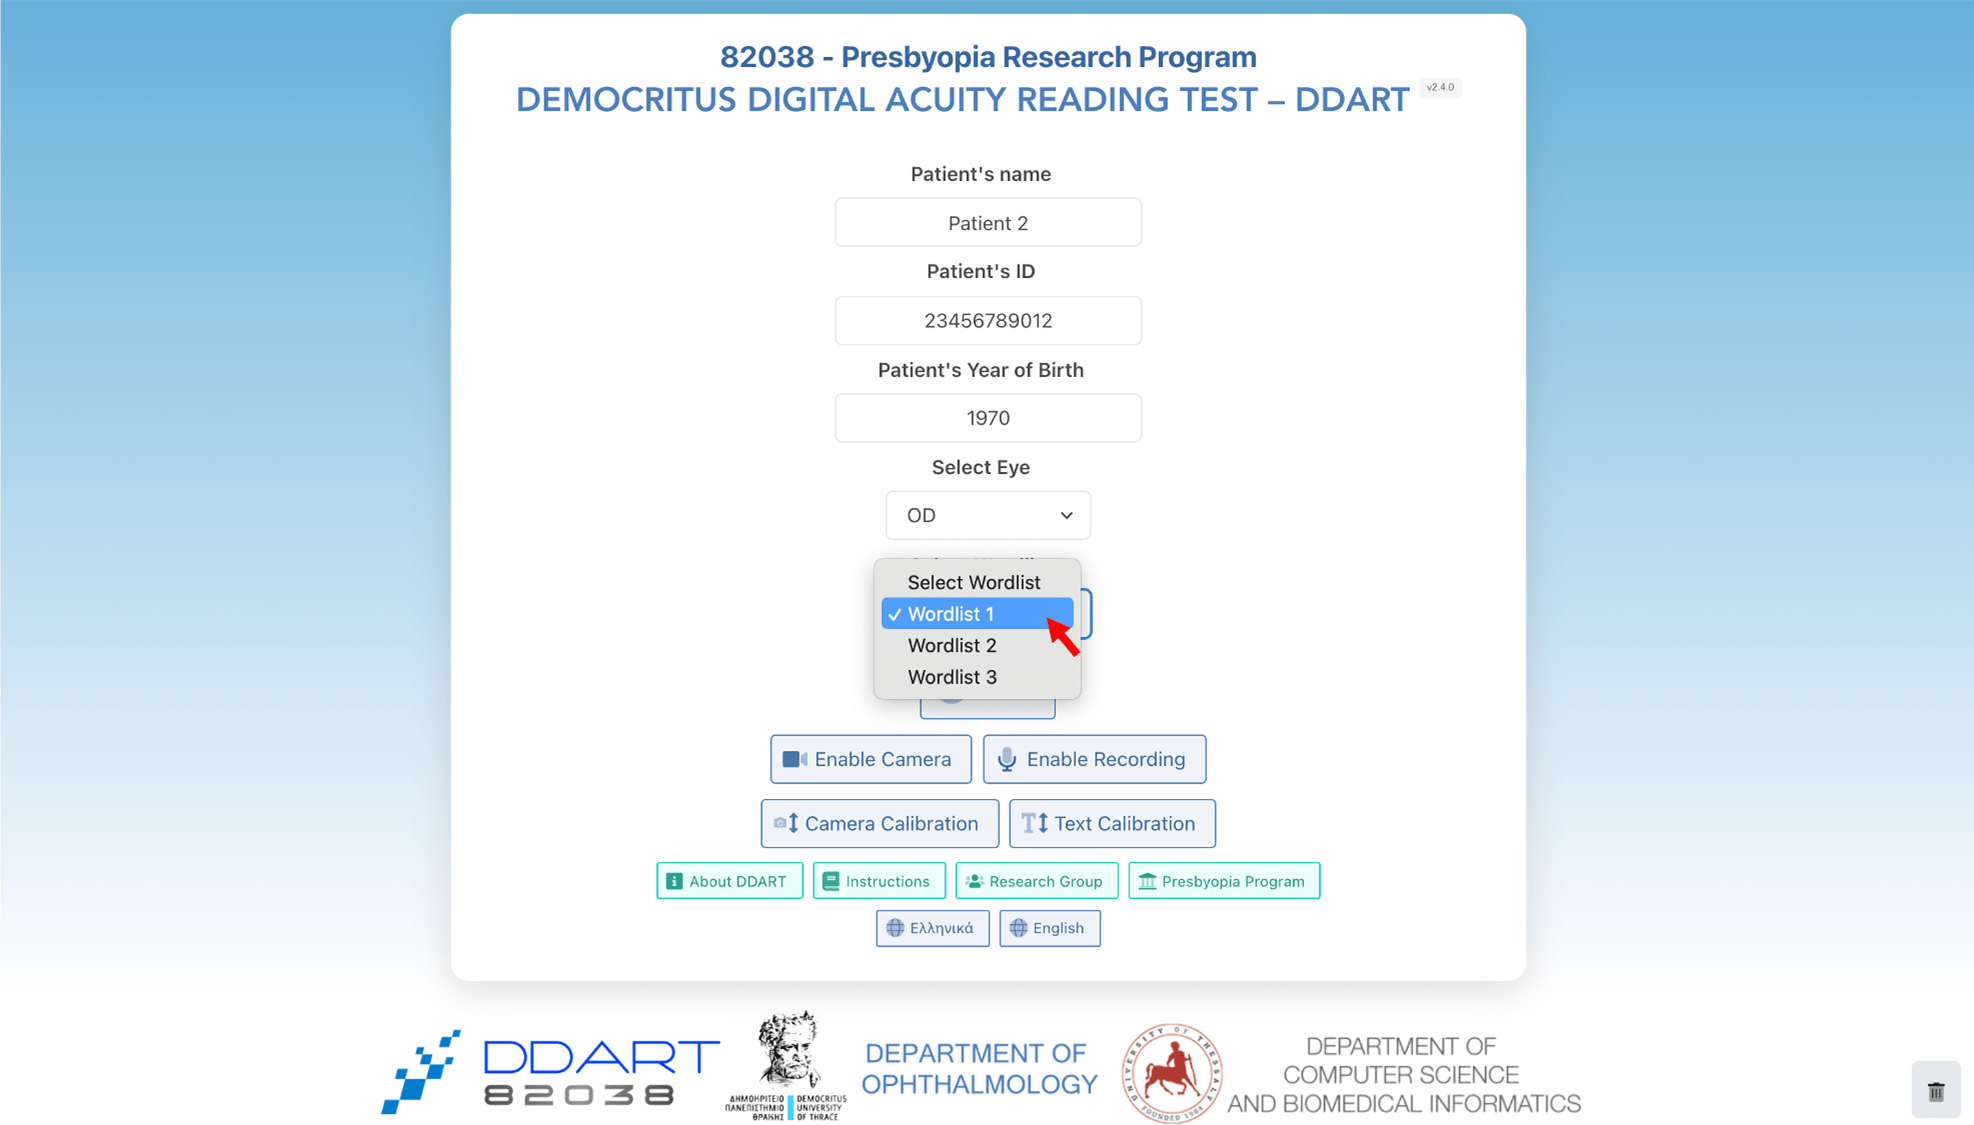
15. Choose one wordlist among the 6 available versions.
16. Please set monitor’s brightness to 100%.
17. (a) Then press “Enable Camera”.

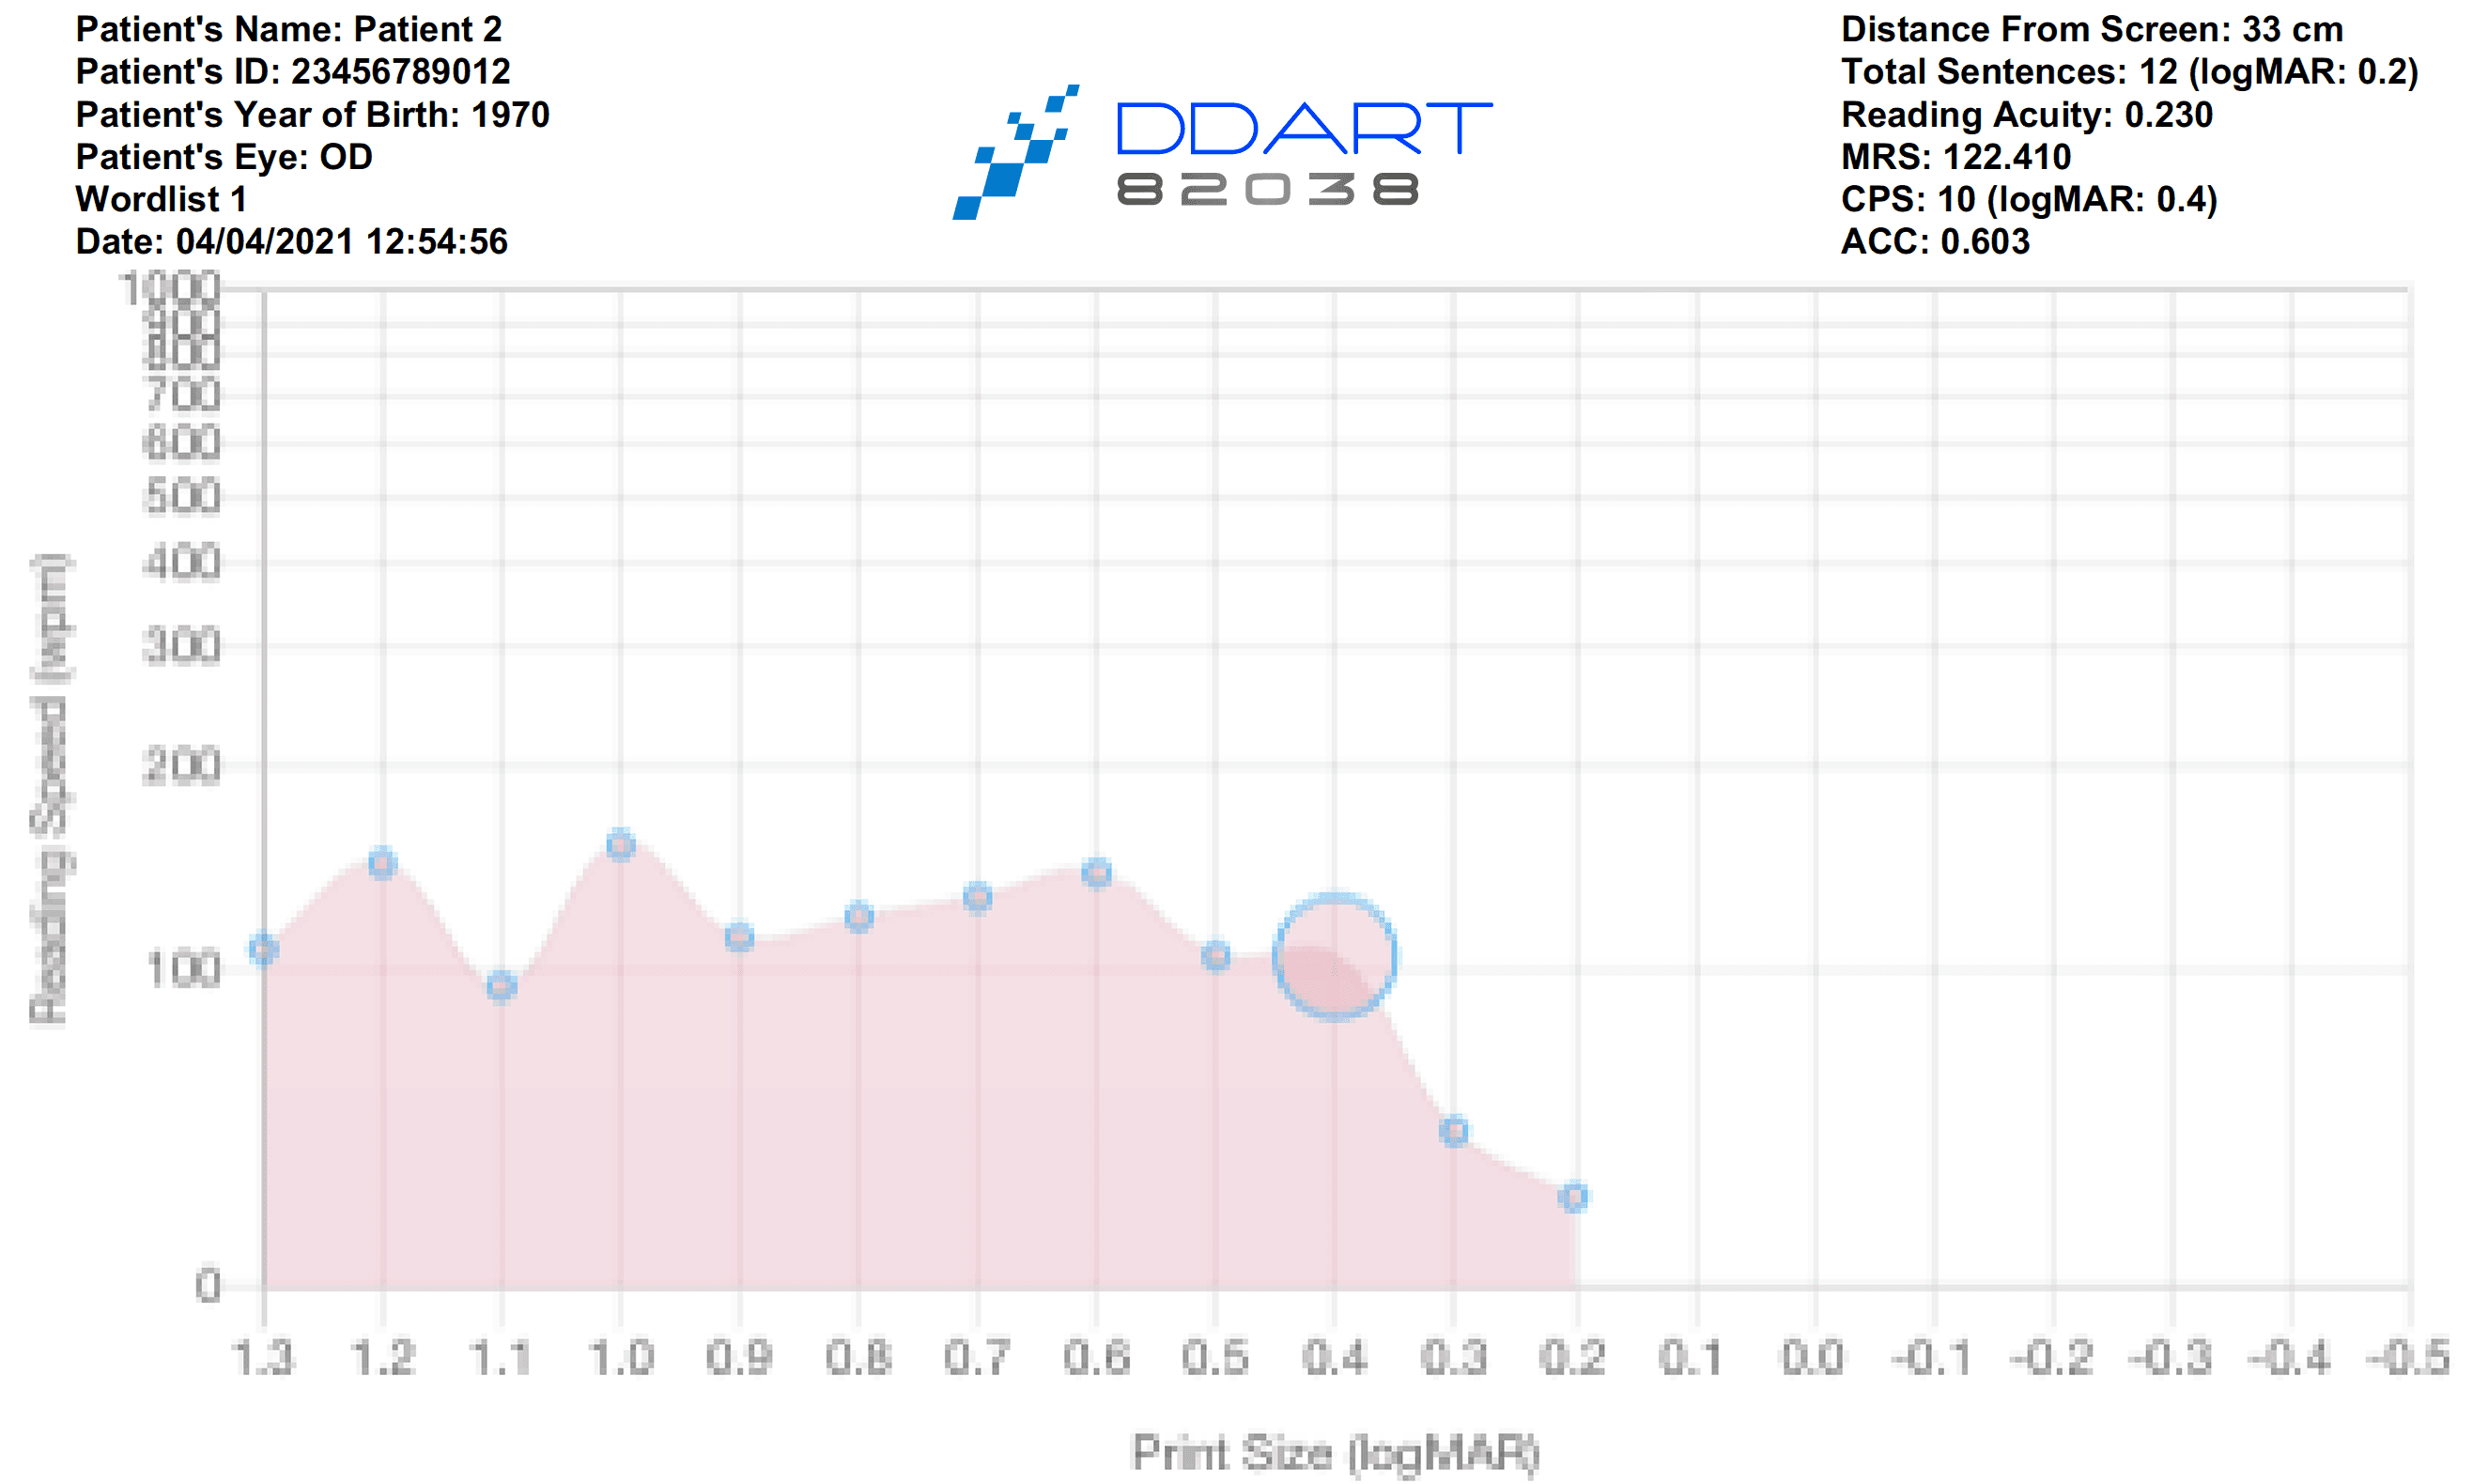
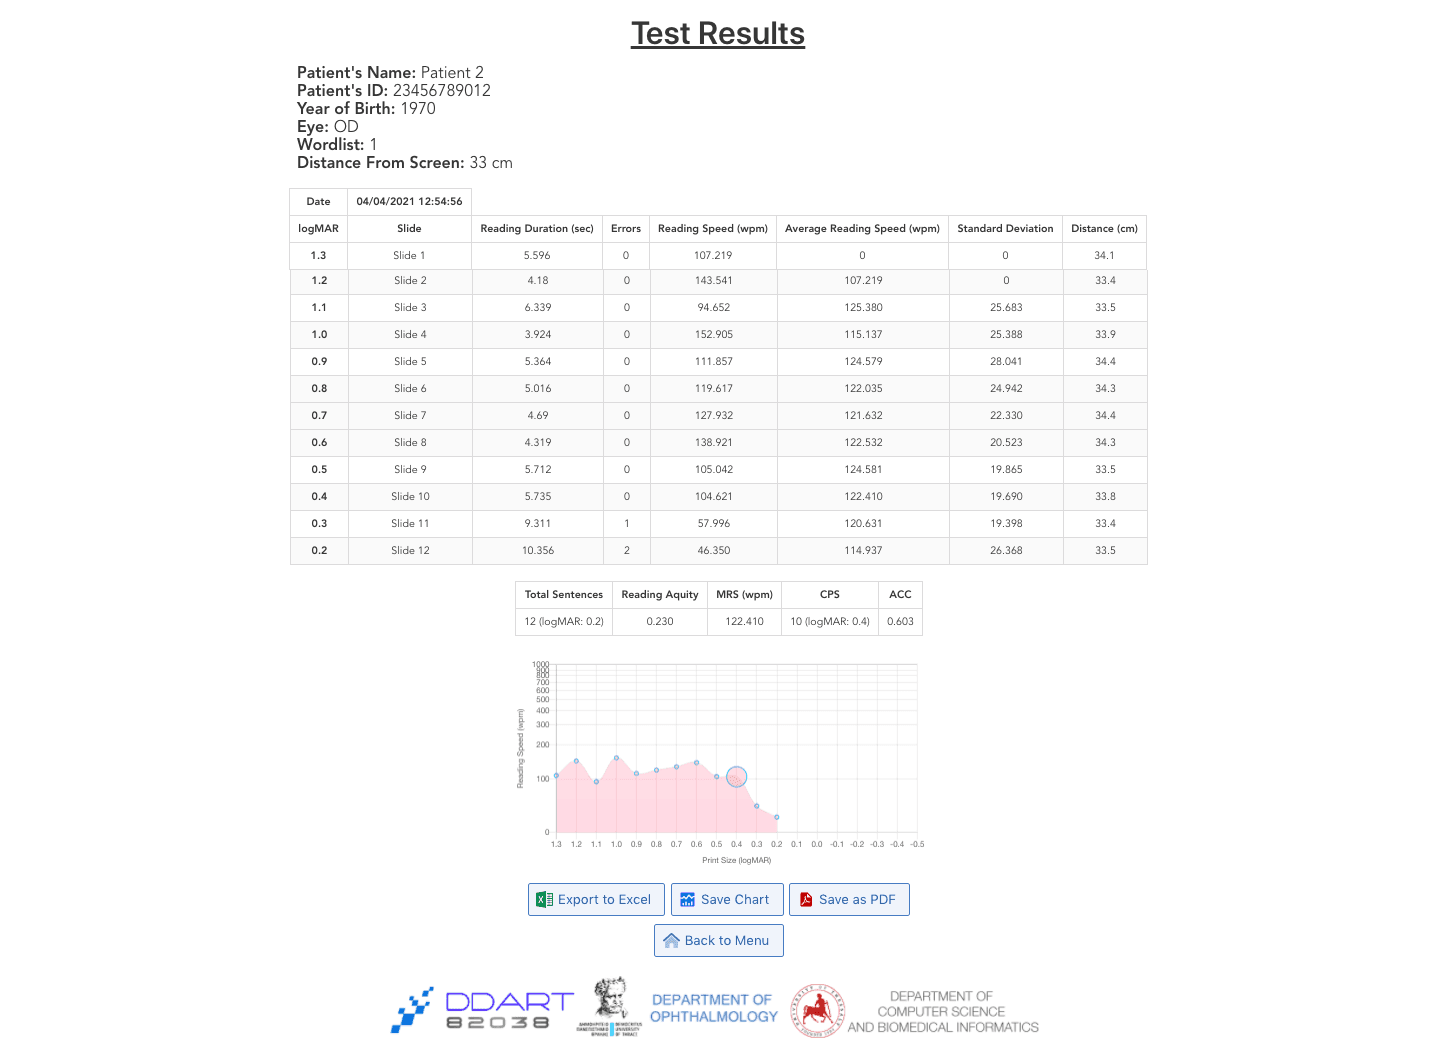
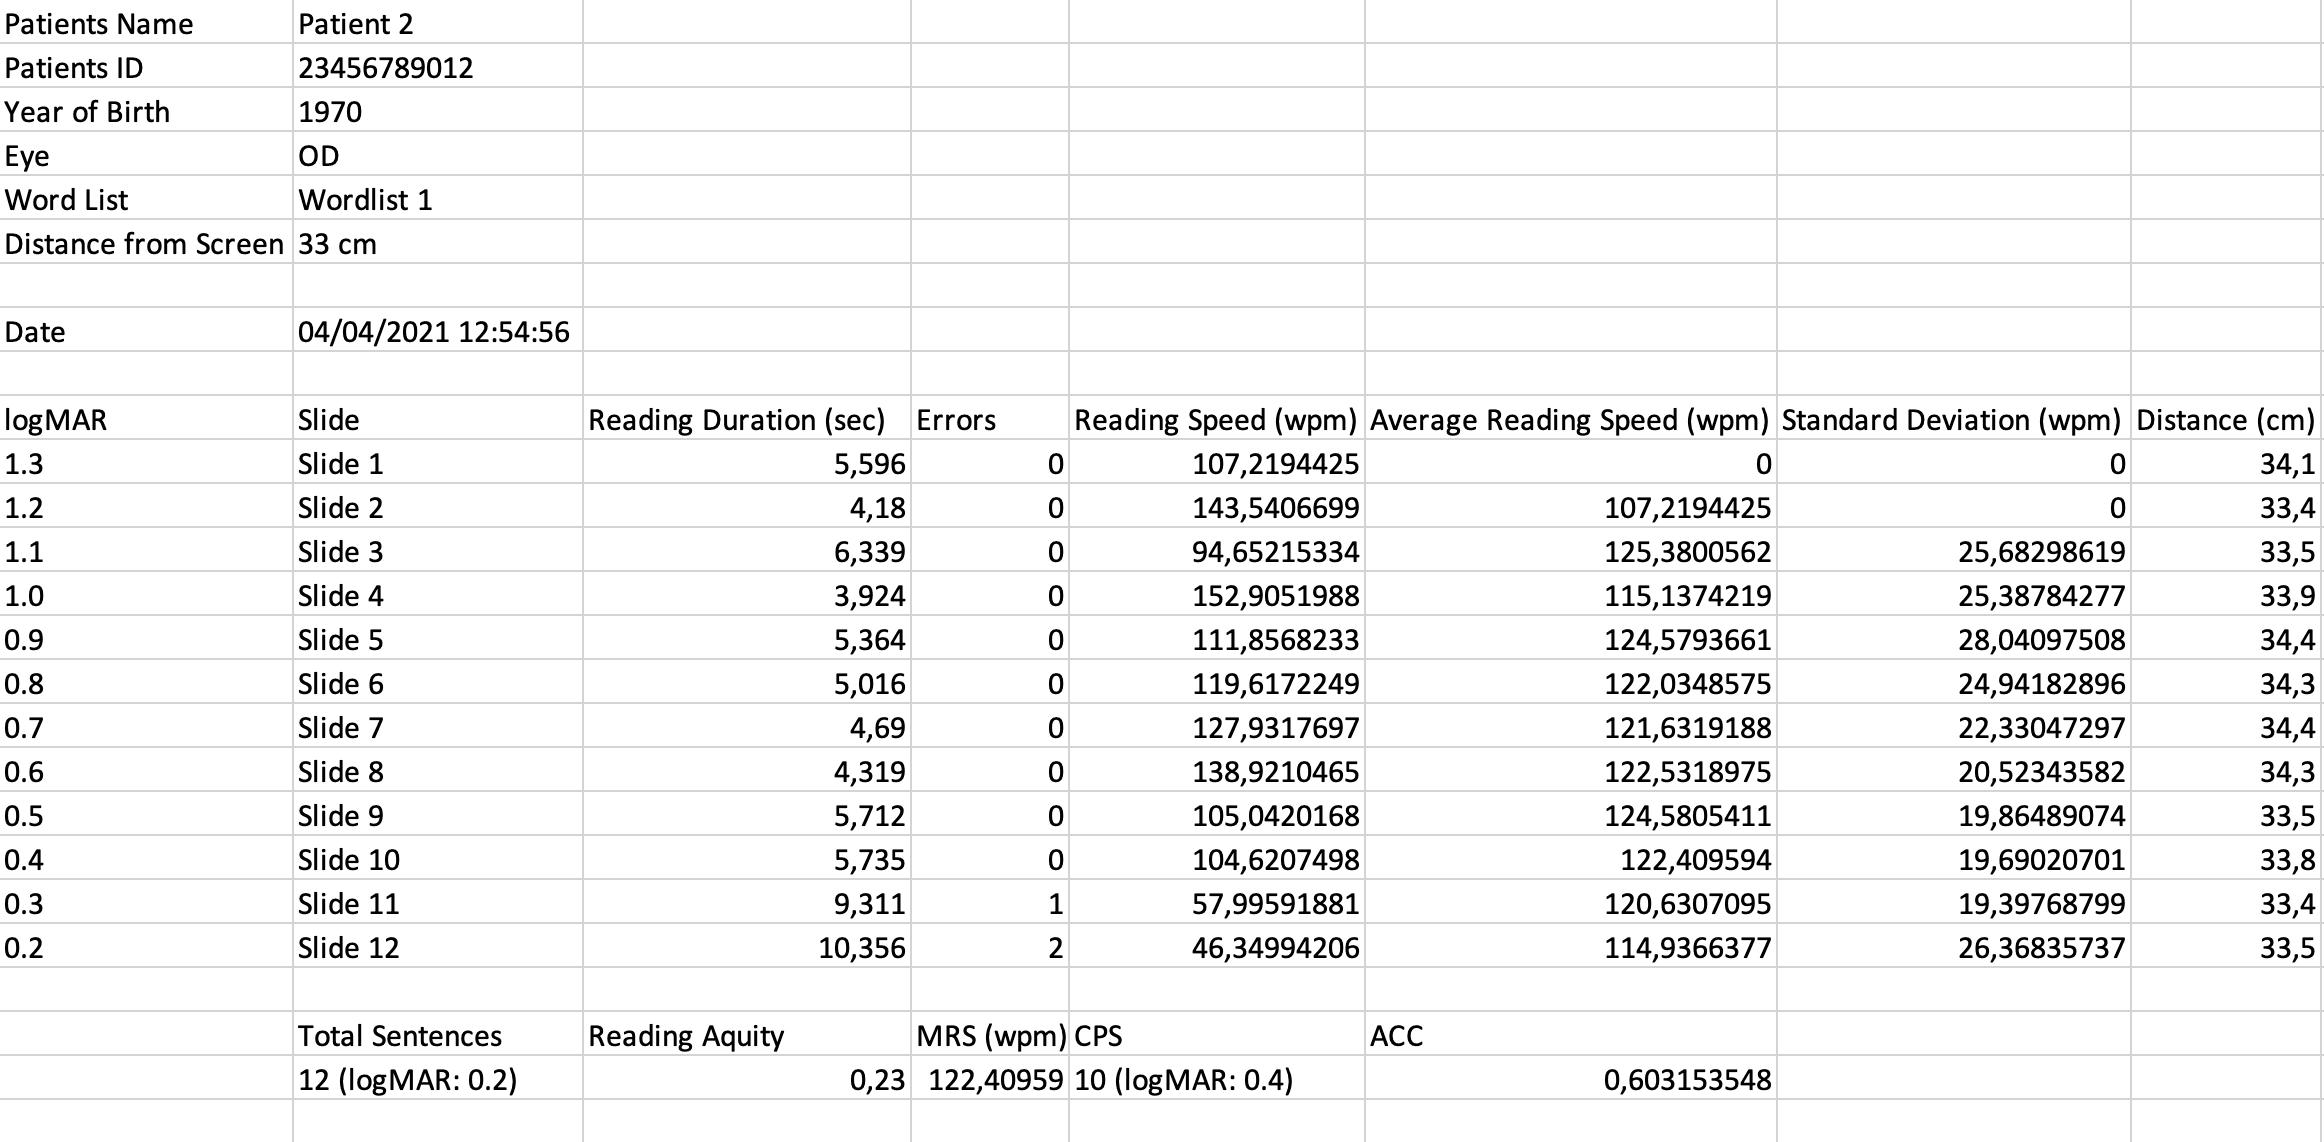
17. (b) A green message of successful camera activation will appear on the bottom right corner.
.png&w=3840&q=75)
18. (a) In case you want to enable audio recording for a more accurate assessment of your patient’s reading times (optional), select “Enable Recording” from the main menu.
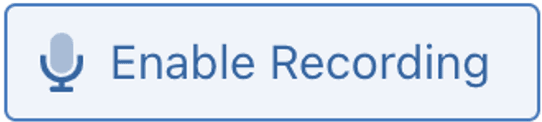
18. (b) A green message of successful audio recording activation will appear on the bottom right corner.
.png&w=3840&q=75)
19. (a) In case you wish to reset all the settings in patient data, text calibration, and camera calibration, you can press the rubbish bin on the bottom right corner.
19. (b) The user is redirected to Step 1.
20. When the patient is ready to perform the test, press “Start”.

21. In case you have activated the camera, please wait a few seconds while it is initialized and place the patient at the appropriate distance from the screen. The distance should be as close as possible to the one determined in text calibration.

22. When the current sentence is displayed on the screen, the patient should immediately begin to read the sentence aloud. Once the text is read, select “Stop”.
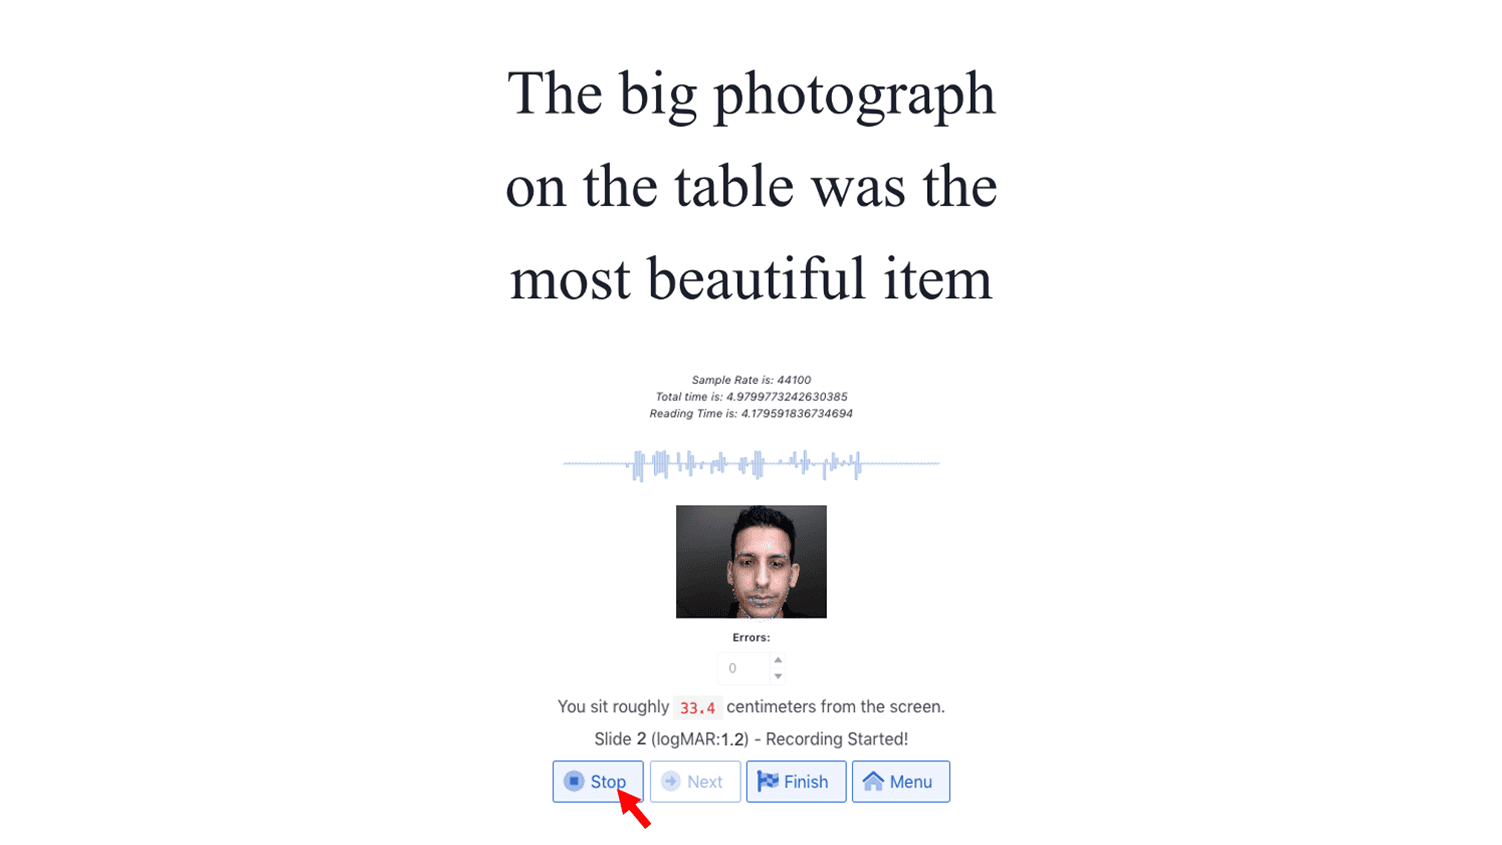
23. Reading time [talk duration = total duration – (post-talk delay)] can be automatically calculated by processing the acquired patient voice.
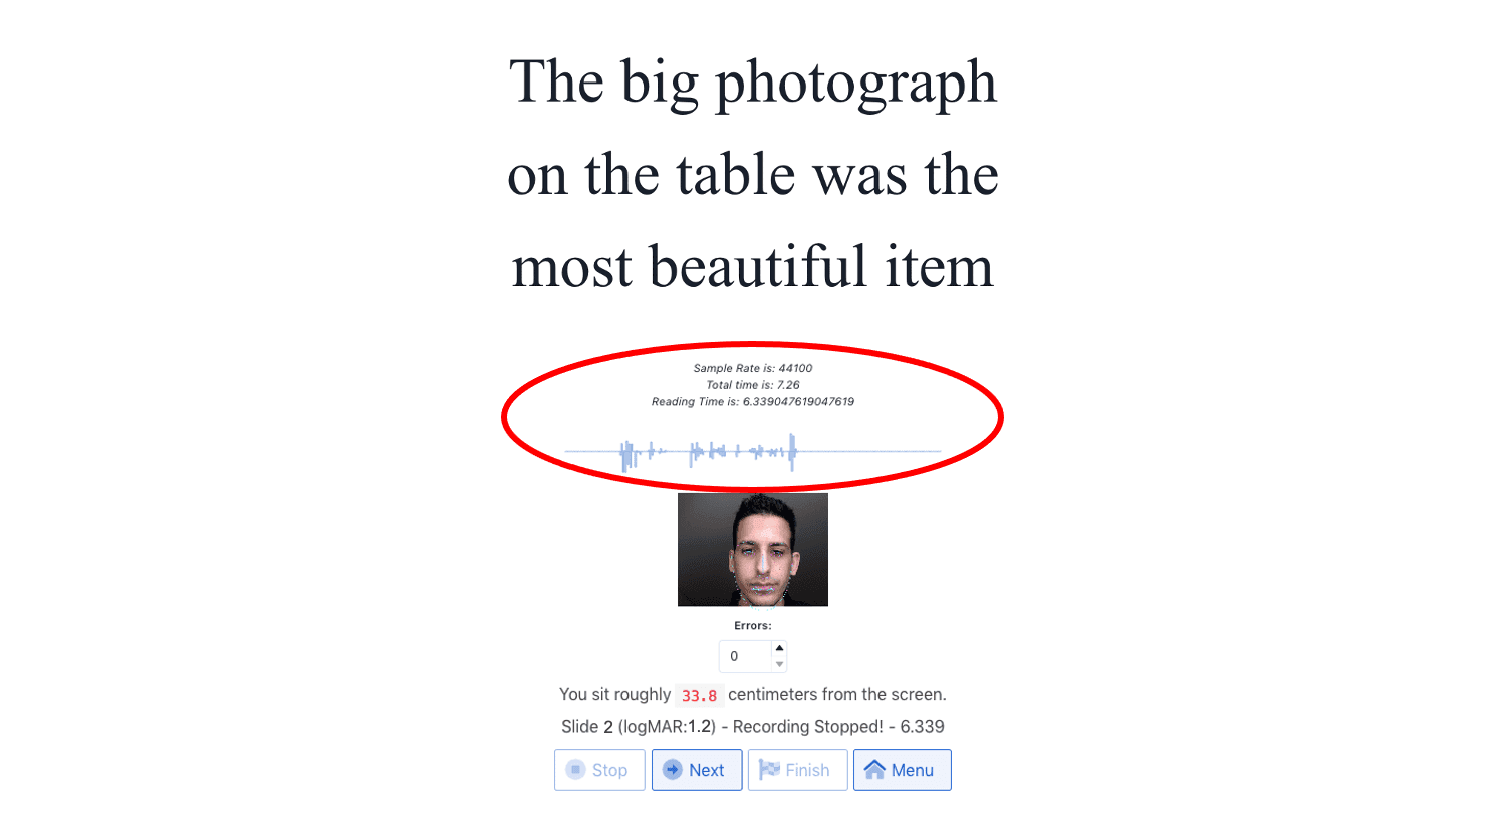
24. Fill in the number of words that have not been read correctly in the “Errors” box.
25. Then, select “Next” to proceed with the test to the next slide and follow the rules described in steps 22-24.

26. The process is being continued until the patient is not able to read the sentence or all the sentences have been successfully read. In case the patient cannot read a sentence, press “Finish”. In case, the patient reads all the sentences successfully, the results menu will be automatically displayed.
27. Results may be exported to a spreadsheet database (XLS), a JPEG file or printed in portable document format (PDF). No demographic or clinical data is stored in the server computer.
27. (a)
27. (b)
27. (c)
_f%20(low%20analysis_).png&w=3840&q=75)
27. (d)